Monday 10 January 2011

Finished Character!

Finally after a lot of time and problem solving i completed my character. I was very happy with my finished character especially considering as i still consider myself a beginner in modelling, rigging, UV mapping and texturing. There were some aspects though which i was not happy with, unfortunately i ran out of time so i did not get to model the belt and did not get to model my characters clothing in enough detail. This takes away some realism and makes my character and model look very ruff. So overall my character is far from perfect, but taking into consideration my lack of knowledge and experiance i feel that i did very well. On a good note I certainly learnt a huge amount over this project and thoroughly enjoyed creating my character. Below is an image of my finished character.


Above is an image of My Character in Perspective view.


Above is an image of my character in the left side view.


Above is an image of my character in the back view.


Above is an image of my character in the right side view.


Above is an image of my character in the bottom view.


Above is an image of my character in the front view. 

UV Mapping and Texturing

I had never done any UV mapping or texturing before so i had to learn from scratch. I watched a set of tutorials that were kindly given to me by a fellow student. These were extremely helpful and taught me a lot. I started by UV mapping my props. Below are images of the UV maps of my props. I rearranged the shells in the UV texture editor and sewed them together so that the texture applies better to the model.


Above is an image of the UV Snapshot of The Gas Mask.


Above is an image of the UV Snapshot of the Walking Stick and Bayonet. 


Above is an image of the UV Snapshot of the Helmet.


Above is the image of the UV Snapshot of the Ammunition Tin. 

I then went onto UV mapping my character. This was very challenging and time consuming as there were lots of shells all over the place in the UV texture editor. However after much time i finally managed to finishing UV mapping my character. Below is an image of the complete UV snapshot of my character. 


I then saved the UV snapshots and opened them in photoshop. I found some textures for my model and props via the internet. I applied the texture to the UV snapshot in photoshop and saved it. I then went back into maya and assigned a Lambert material to my character or props and imported the texture. Most of my props were fine however the character and gas mask took a little tweaking in the UV texture editor. This was due to some face not matching up and over stretching the texture. After along time consuming process i finally sorted all the little issues and resolved them. Below are images of the textures i used. 


Above is the texture that i used for the ammunition tin. 


Above is the texture that i used for my characters clothes. 


The image above is the texture that i used for breathing parts that are attached to the gas mask. 


Above is the texture that i used for my characters shoes.


Above is the texture that i used for the connector between the walking stick and bayonet.


Above is the texture that i used for the main body of the gas mask.


Above is the texture i used for my characters hair.


I used the above texture for the walking stick. 


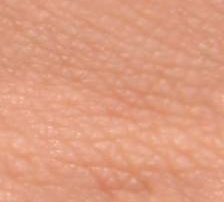
Above is a skin texture that i used for my character.


Above i used for the texture of the socks the texture is wool.

Overall i was happy with the textures that i chose, i think that they fit well with how the model should look. 


Rigging

I hadn't done much rigging before so i followed some tutorials to teach me the basics. To begging with i found it fairly easy. However i then went to attaching handles and they had an effect but not to degree they should. I tried this many times but was having the same response every time. So for the time being i got around the problem but just simply rotating the joints individually. Which was very time consuming and took a lot longer to get the result that i wanted. Below is an image of my rig.

Modelling

I then took my reference images and set the scenes so i could begin modelling. Below are images of the reference images and set scenes.


I then began modelling. I started by modelling the props. Below are some images of my modelled props.


Above is an image of the model of the Prop Ammunition Tin. 


Above is an image of the model of the Prop of the Helmet.


Above is an image of the model of the Prop of the Gas Mask.


Above is an image of the model of the Prop of the Walking Stick with Bayonet attached. 


  I then started Modelling my character. This started off fairly well however i then found it difficult modelling the hair and chest of my character. I tried many different ways of trying to improve my models hair and chest and eventually got something that i was reasonably happy with. They could still be a lot better however. Below are some images of some of the stages of modelling my character.


Above is an image of the first stage. I personally thought that i got off to a good start.


Above is an image of stage 2. I was relatively happy with how the model was looking however the hair and chest was not up to standard as i mentioned earlier. 


Above is an image of the third stage. I mirrored the half of the model that i had created which gave me the complete body which made the chest of my model look even worse so i cut out the chest as you can see in the image above and re modelled it. 


Above is an image of stage 4 which is the complete model. I was extremely happy with how it turned out as i do not have much modelling experiance. Yet there are still some glitches therefore it is not quite the perfect model. 

Now to move onto rigging! 

Final Design

After drawing several designs i then looked back over them and started to decide which design i wanted to use for my final character. After taking me time i finally chose one. Below is an image of the design that i chose. 


I chose this design because i thought that it had a lot of potential and was interesting yet not too extravagant. It also provided some challenges which would allow me to develop my modelling ability and my knowledge in maya. This design has all the key concepts of the basic character desciption and includes my own personal touch. 

I then took the character and all of it props apart. Such as the gas mask, walking stick and bayonet, and the ammunition tin. I drew each prop and the character individually and drew all of their orthographic views. Such as the top view, front view and side view. This was setting me up for modelling as i could use these drawings for my reference images in maya. Below are the images i drew for each view of the objects and character. 


I then decided that these drawings were too ruff for my reference images so i redrew them on the computer neatening them up. I also made some improvements to the images such as attaching the bayonet on the walking stick at the other end so that it is in a similar position to where it would be located on a gun. Below are the new and improved reference images. 


I think that the images above are much better reference images as they are a lot clearer due to the cleaner/ bolder lines. They should definately help me when it comes to modelling.